
Photoshop Tip: Selections via Quick Mask
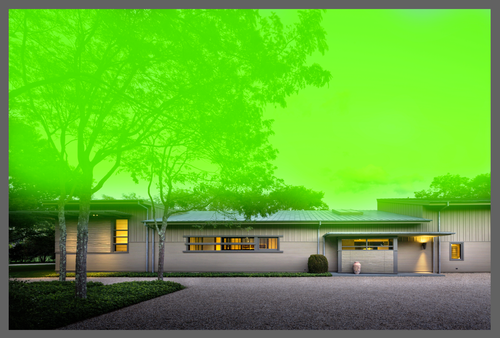
Quick Mask is the ideal way to quickly make an organic selection. The idea of quick mask is that you can use the softness, opacity and size of a brush to quickly “paint” an image area that you wish to adjust. The “pre-adjusted” area will be displayed by your quick mask color (red is default).
To access quick mask, hit the Q key, or click the quick mask button at the bottom of your tool bar:

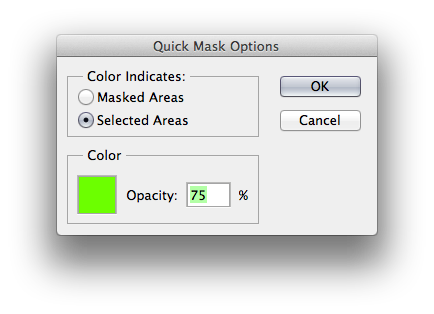
Also, make note: you may want to change the default masking option to “Selected Area” rather than “Masked Area.” You can change that option by double clicking the Quick Mask Button.
before quick mask

after quick mask
Once you paint your quick mask, you will need to hit the Q key, or the Quick Mask button again to convert your quick mask into a selection.
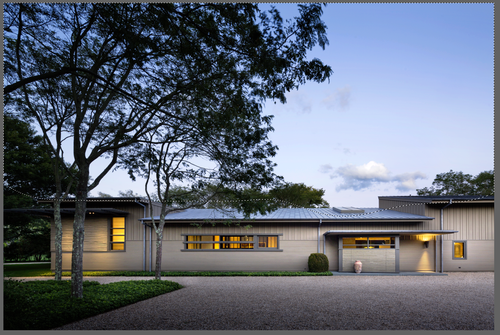
after using the quick mask selection to darken the sky. Notice the soft transition at the edge of the adjustment.

- Jeremiah